Introduction
Create driver account
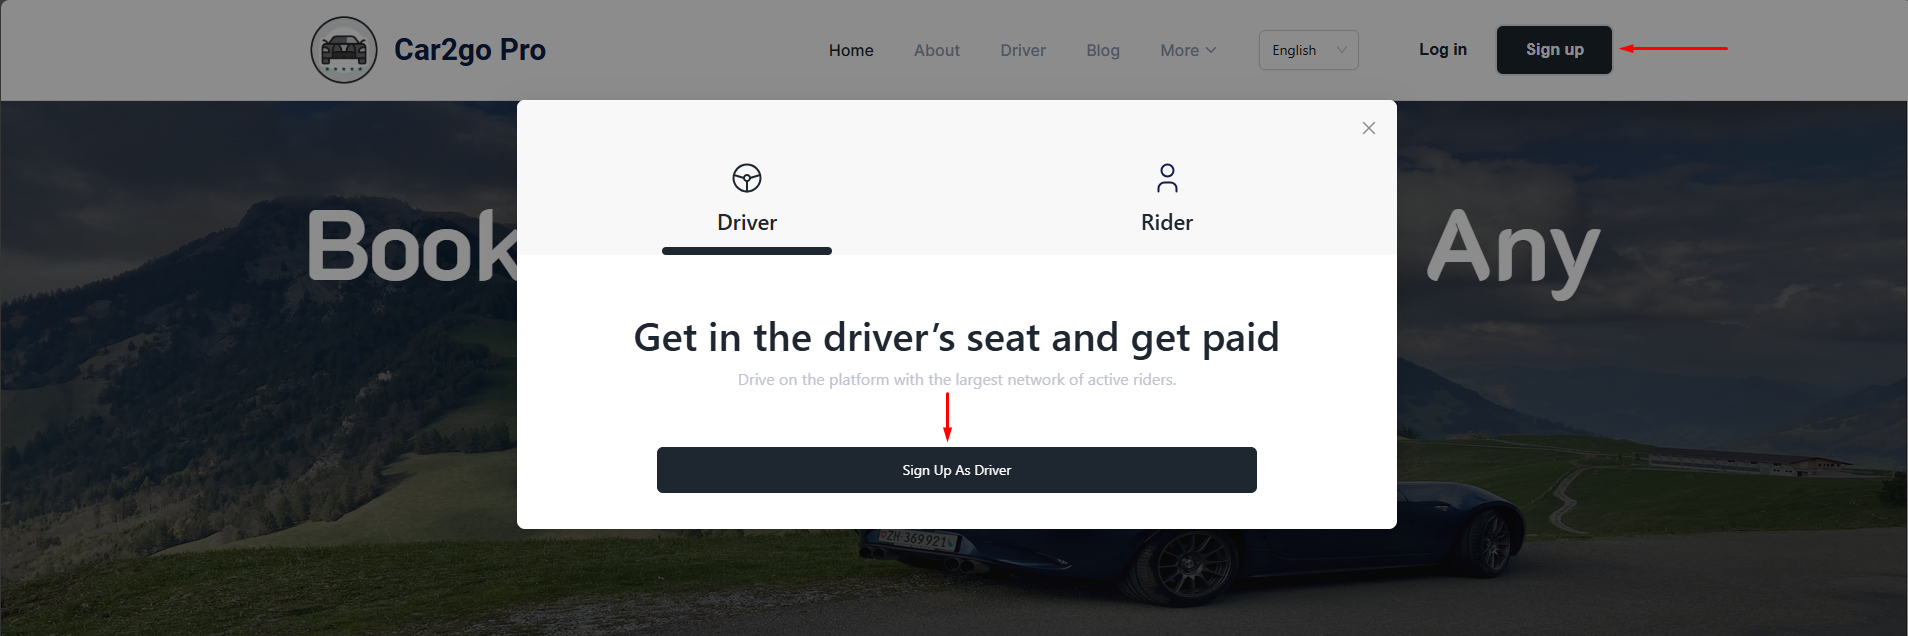
To create a driver account, click the Sign Up button to open the registration modal. Then, select Sign Up As Driver to proceed with the driver-specific registration process.
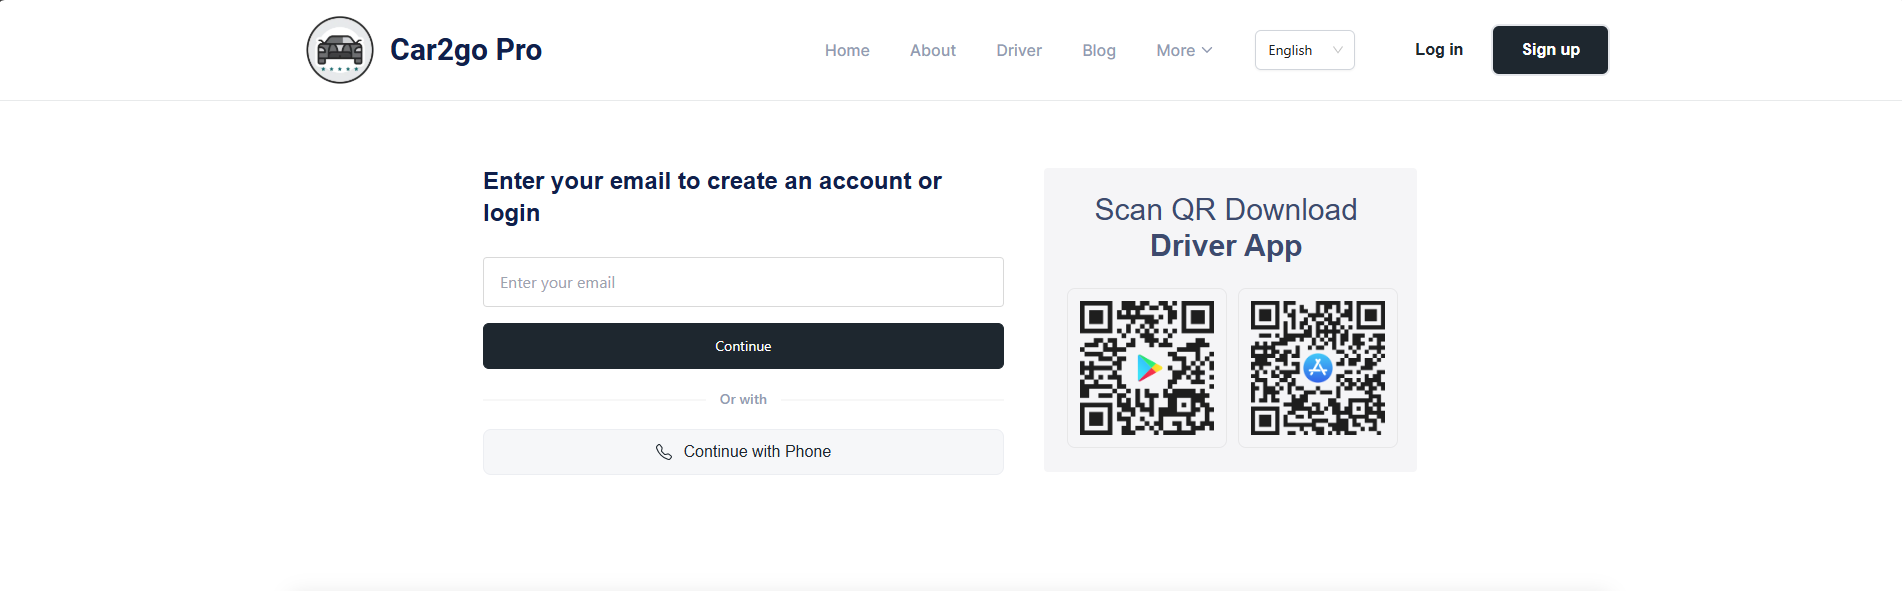
Now, enter your email address to continue with the registration process.
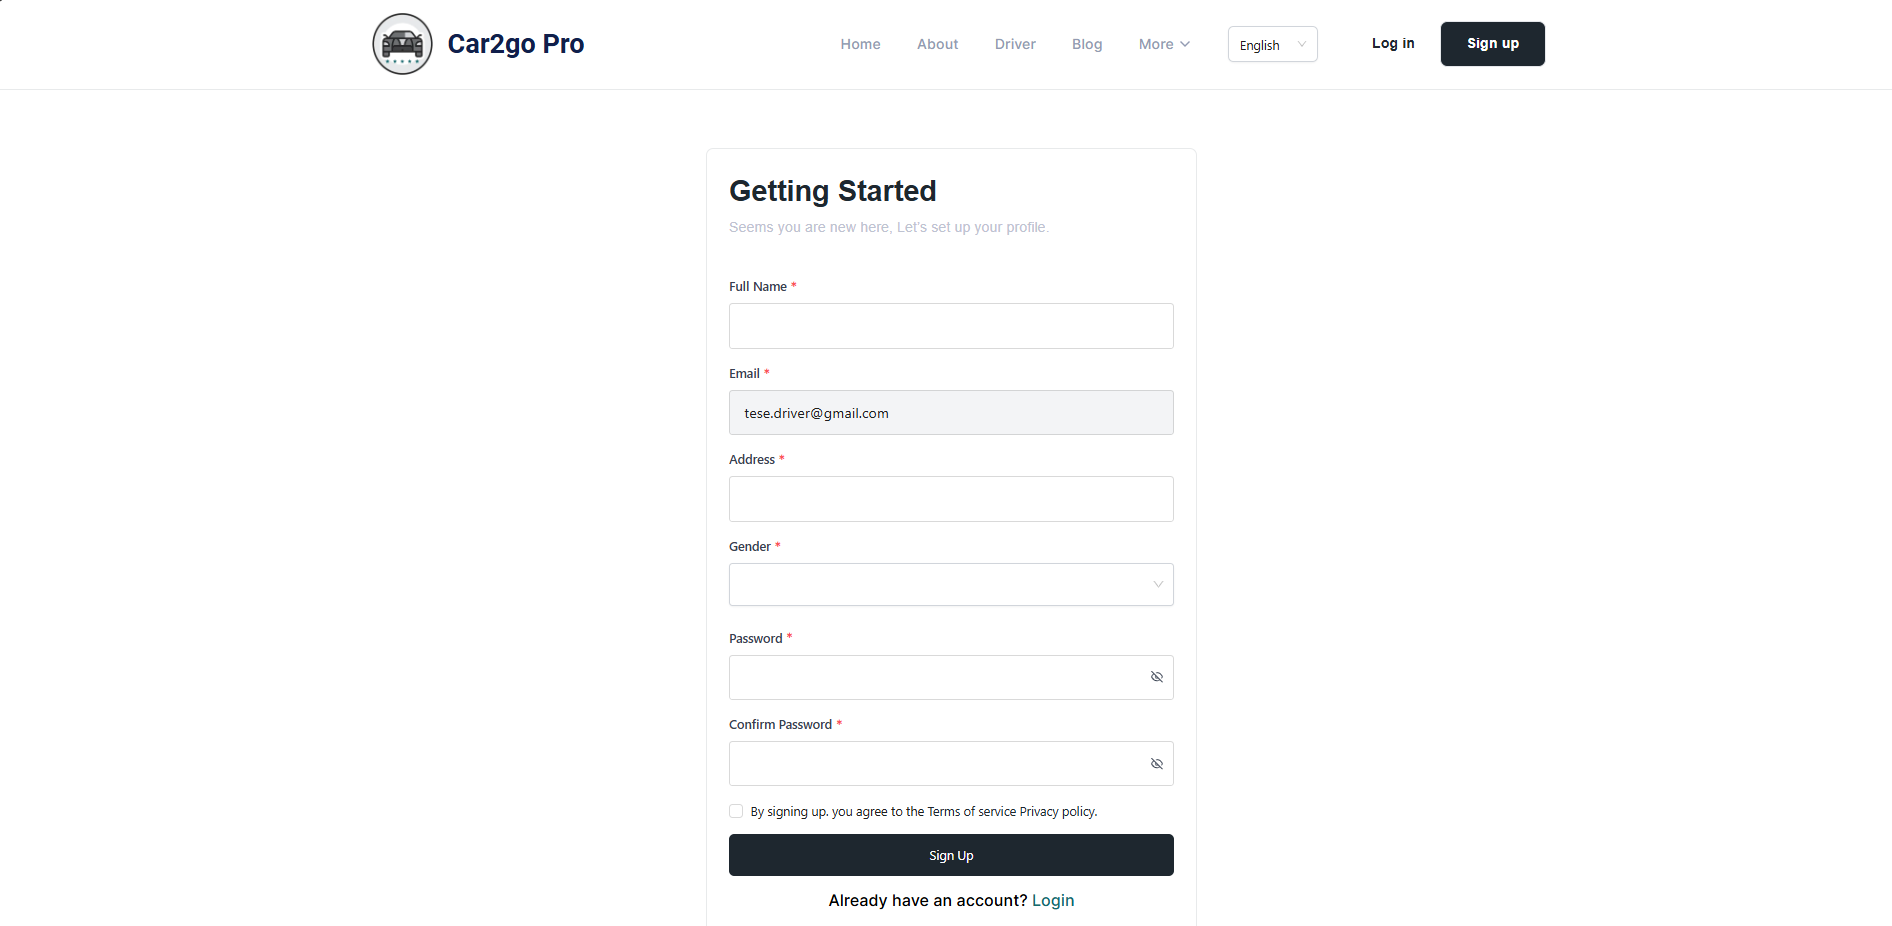
Now, enter all the necessary information such as Full Name, Address, Gender, password and confirm password. And of course you have to click the I agree to the Terms of Service and Privacy Policy checkbox.
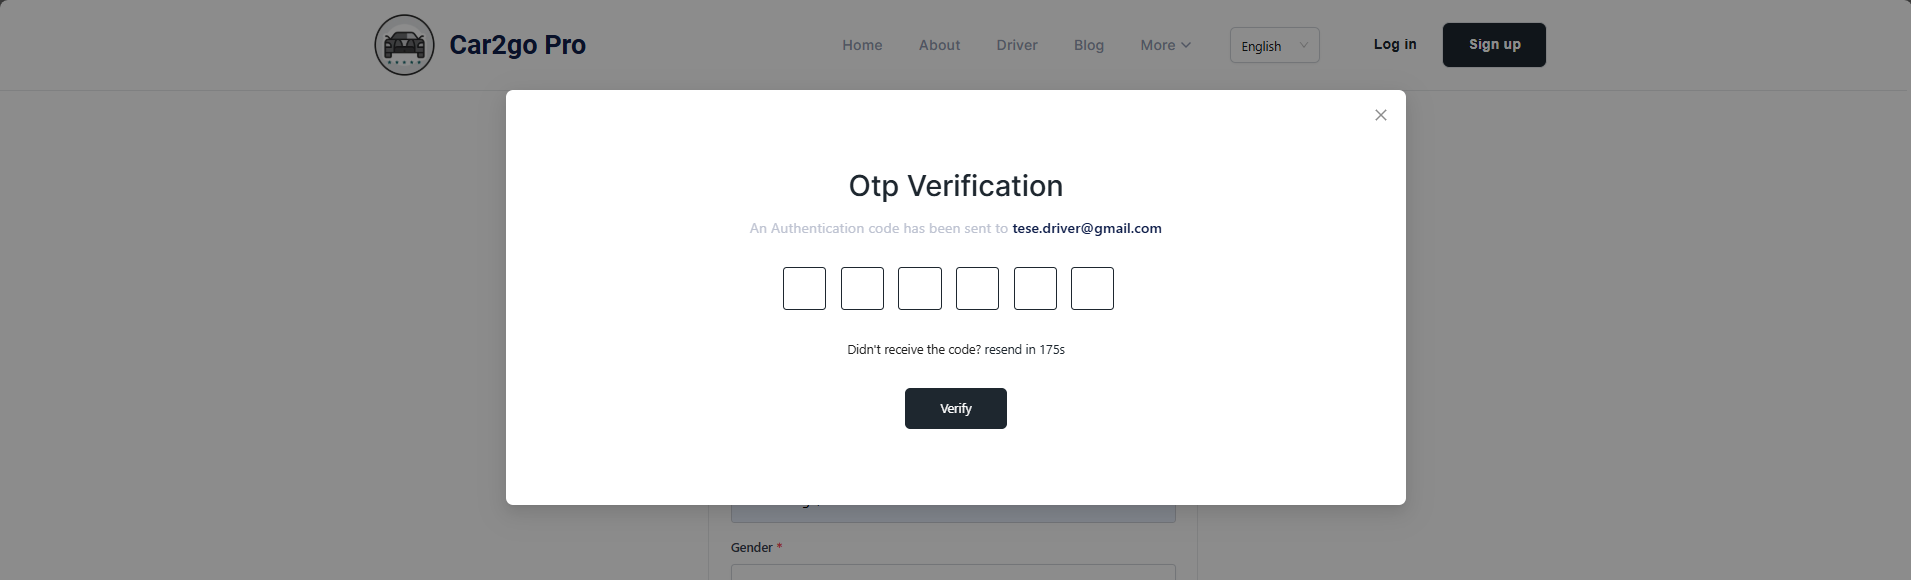
Next, the OTP verification modal will appear. Enter the verification code you received via email and click the Verify button.
Once your driver account is created, you'll be taken to the driver panel. From there, you can add your vehicle type, vehicle details, and driver documents.
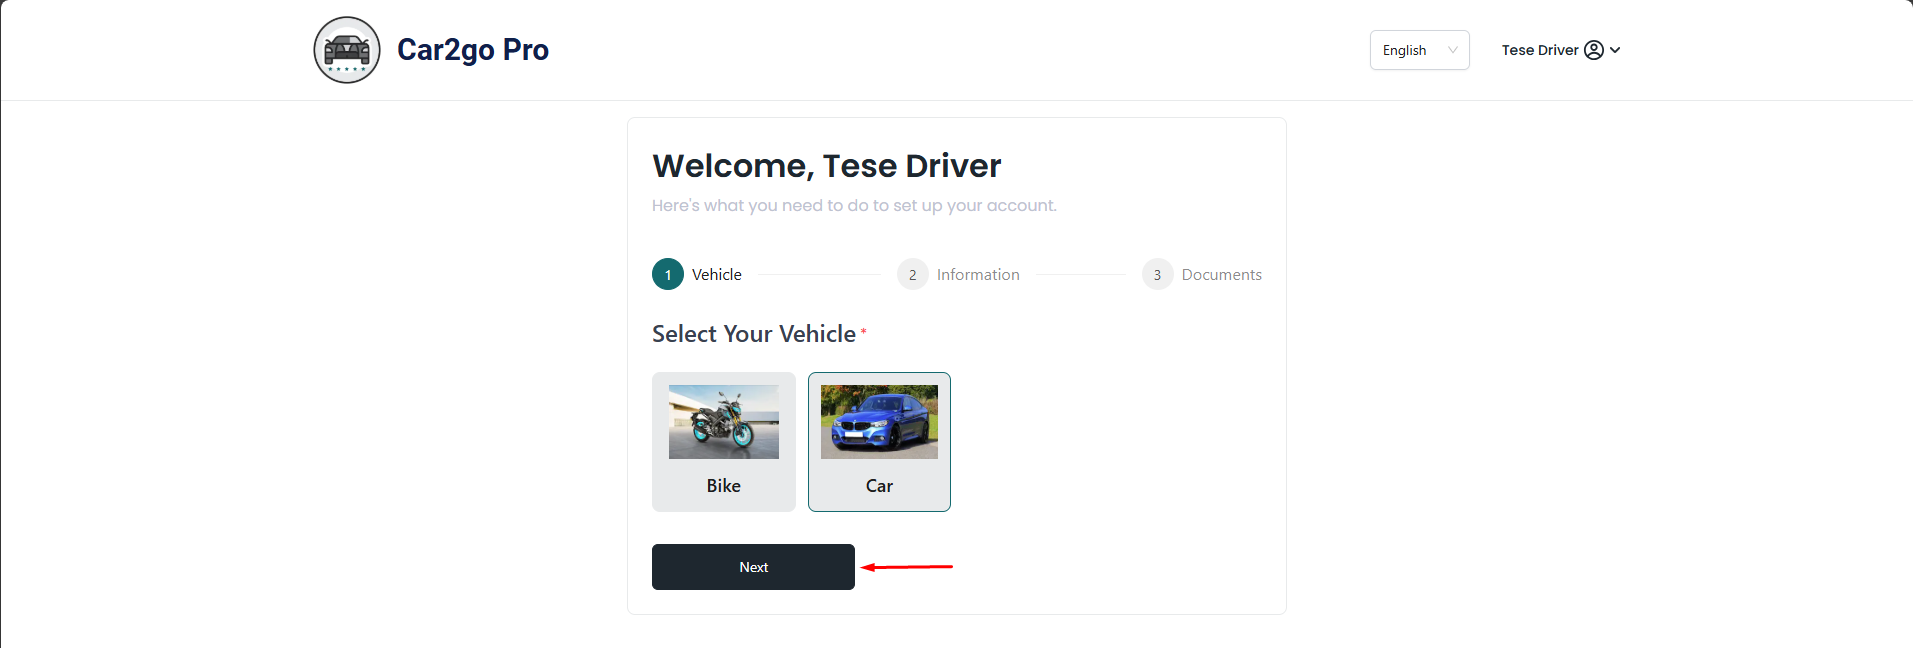
After selecting a vehicle type, click the Next button to enter your vehicle information.
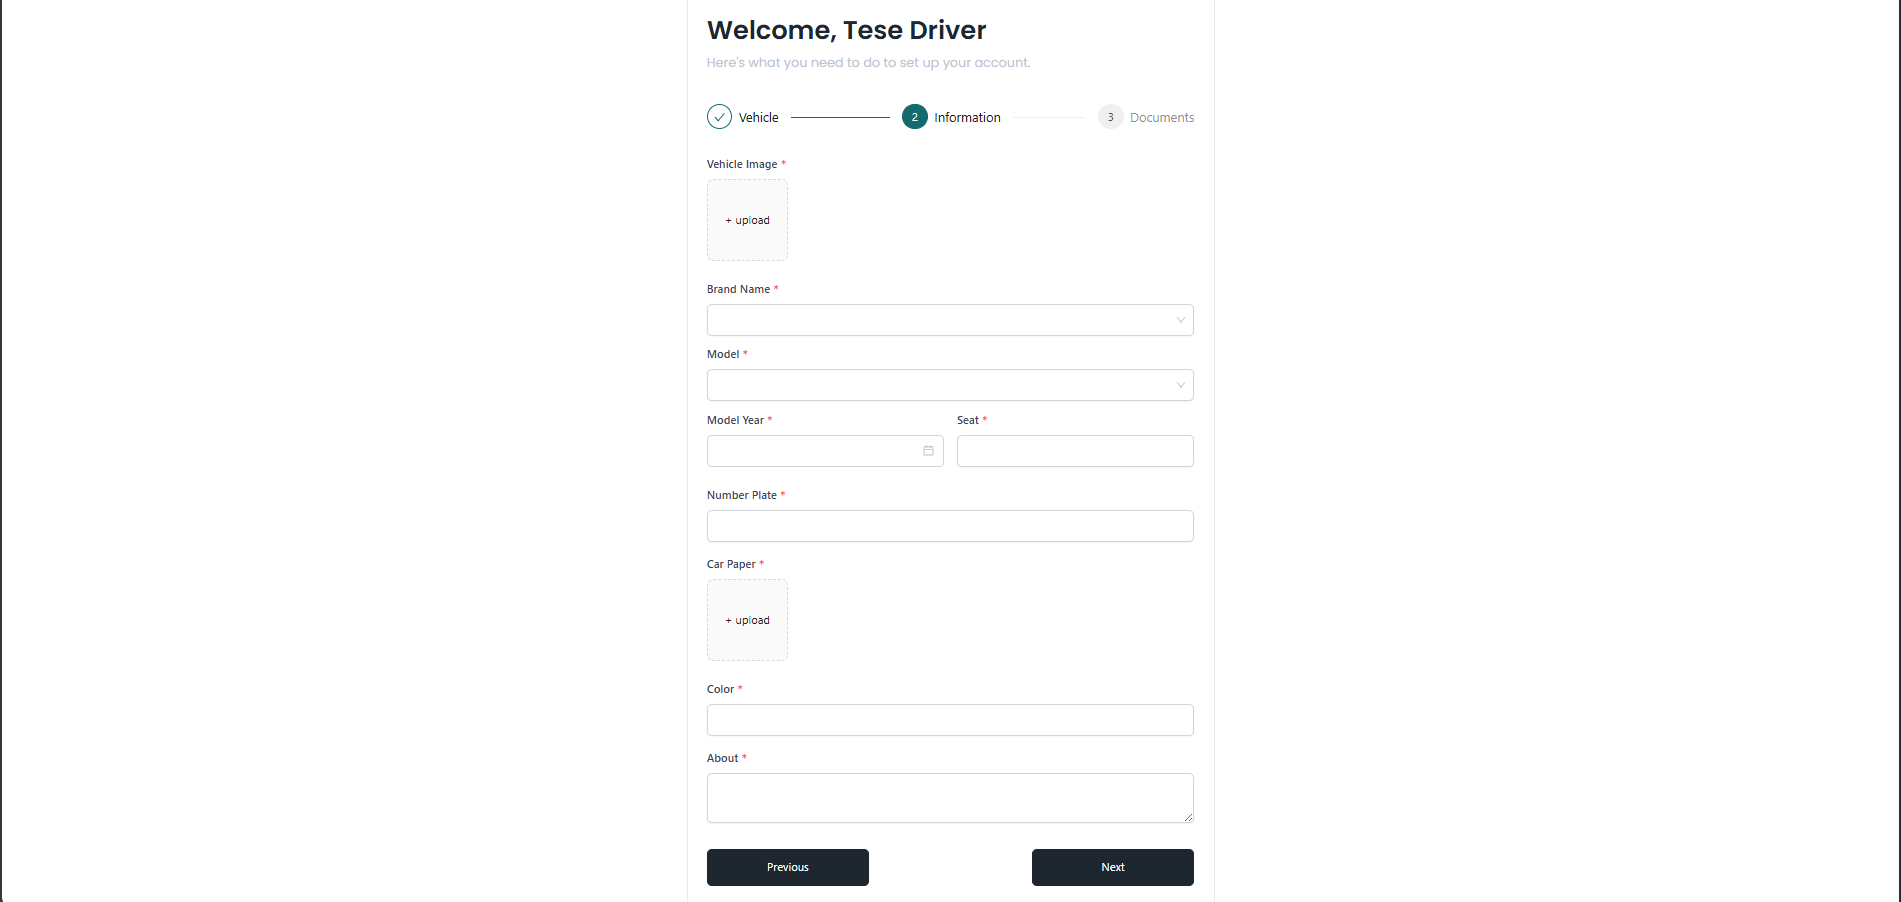
Now, enter all the necessary vehicle informations. Then, click the Next button to proceed with adding driver documents.
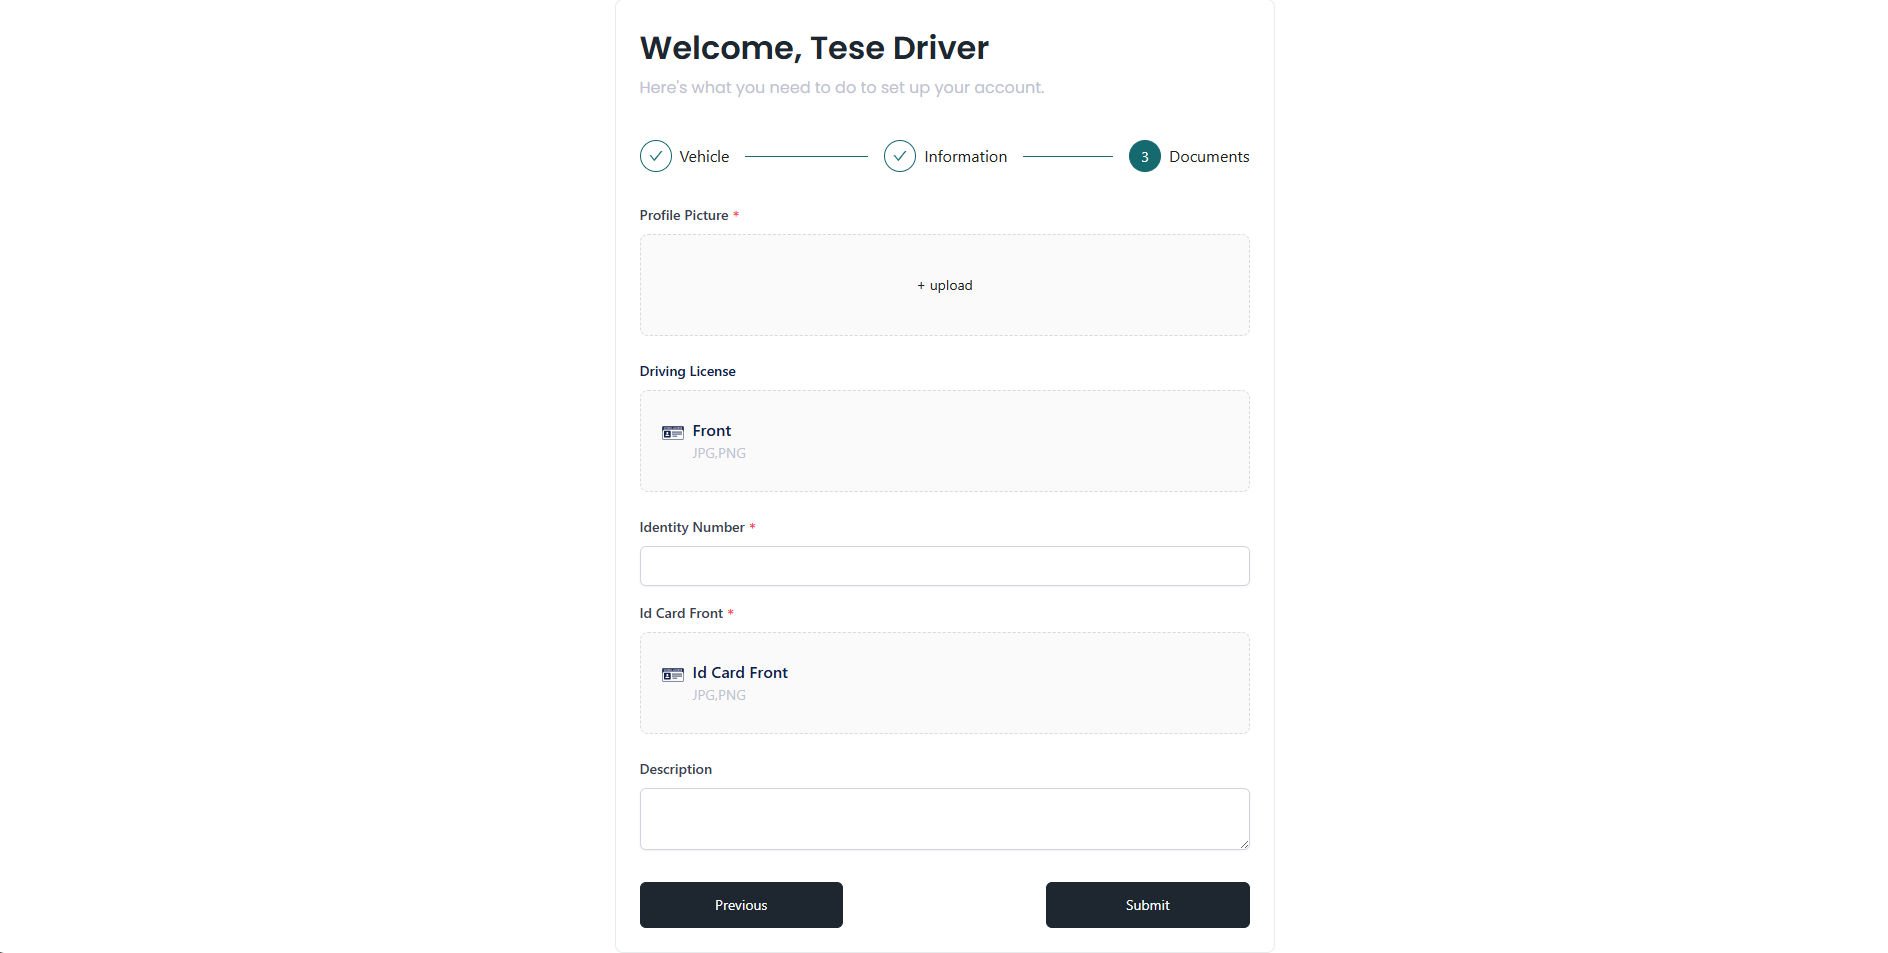
Now, enter your all the necessary driver documents and click the Submit button.
After submitting all the required information, your driver account and vehicle will be created with a "Pending" status.
The admin will review and verify your profile. Once approved, you will be able to start offering rides.
Login to driver panel
To log in to the driver panel, click the Login button to open the login modal, then select Driver to click Login As Driver to proceed with the driver-specific login process.

You have now successfully accessed the Driver Panel.
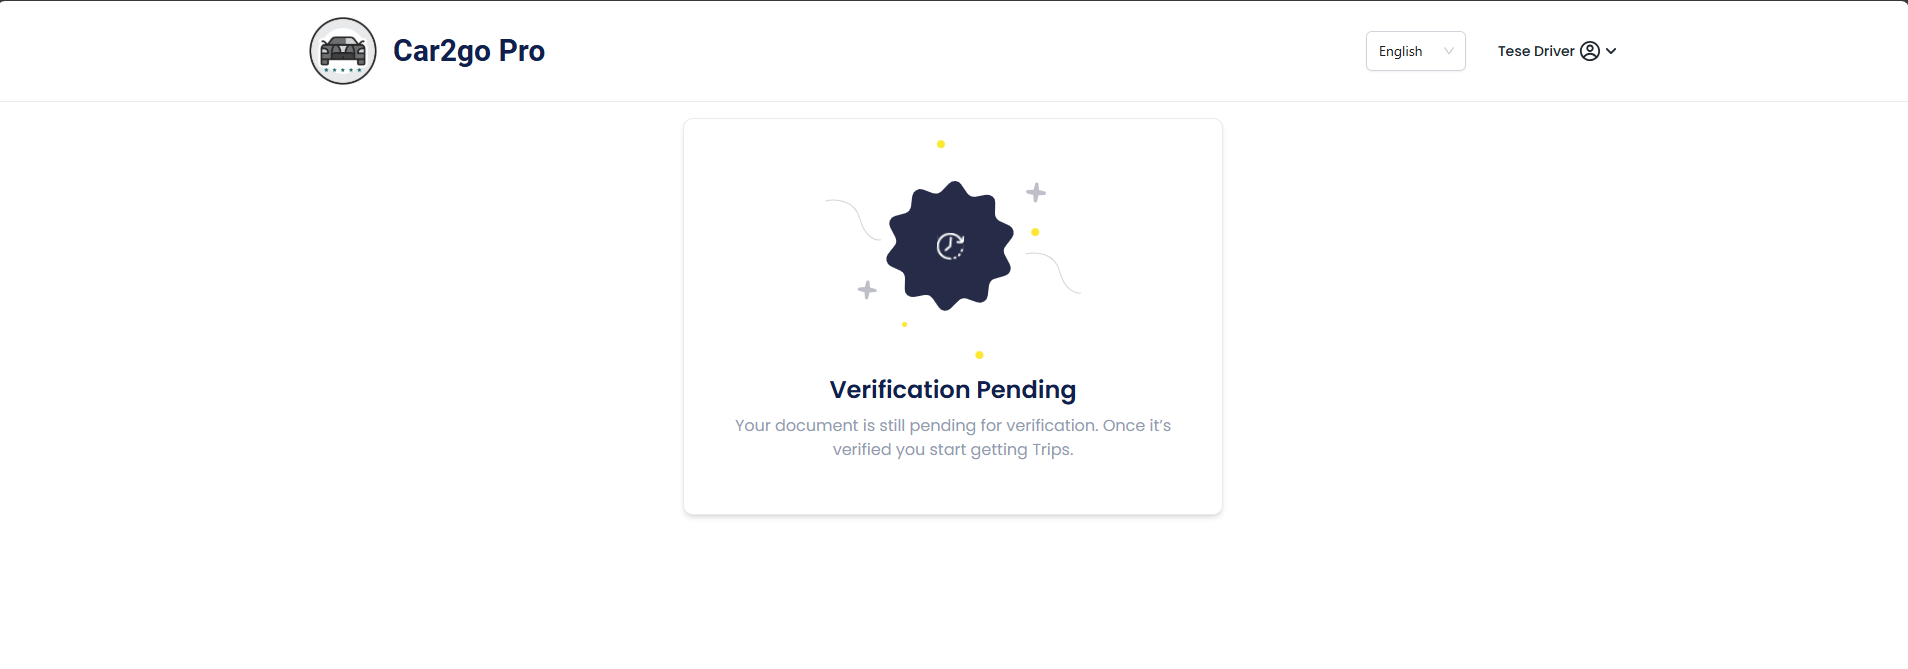
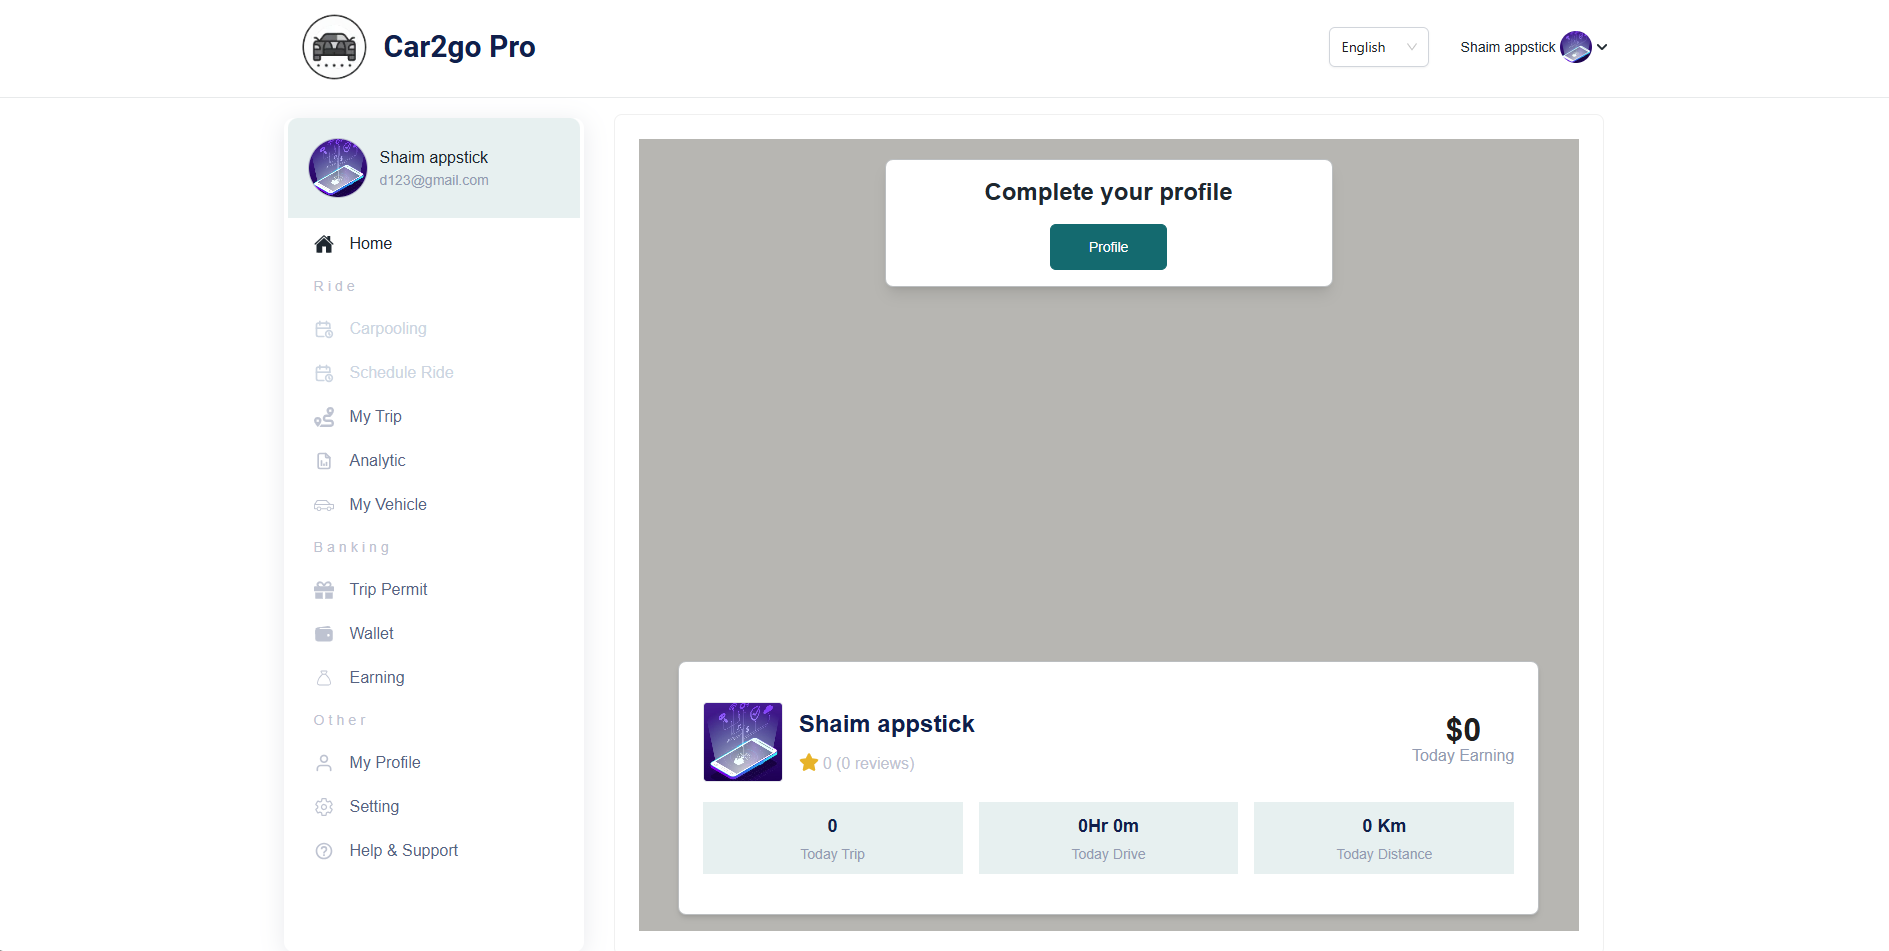
Profile Verification
After accessing the Driver Panel, you must verify your account by clicking the Profile button.
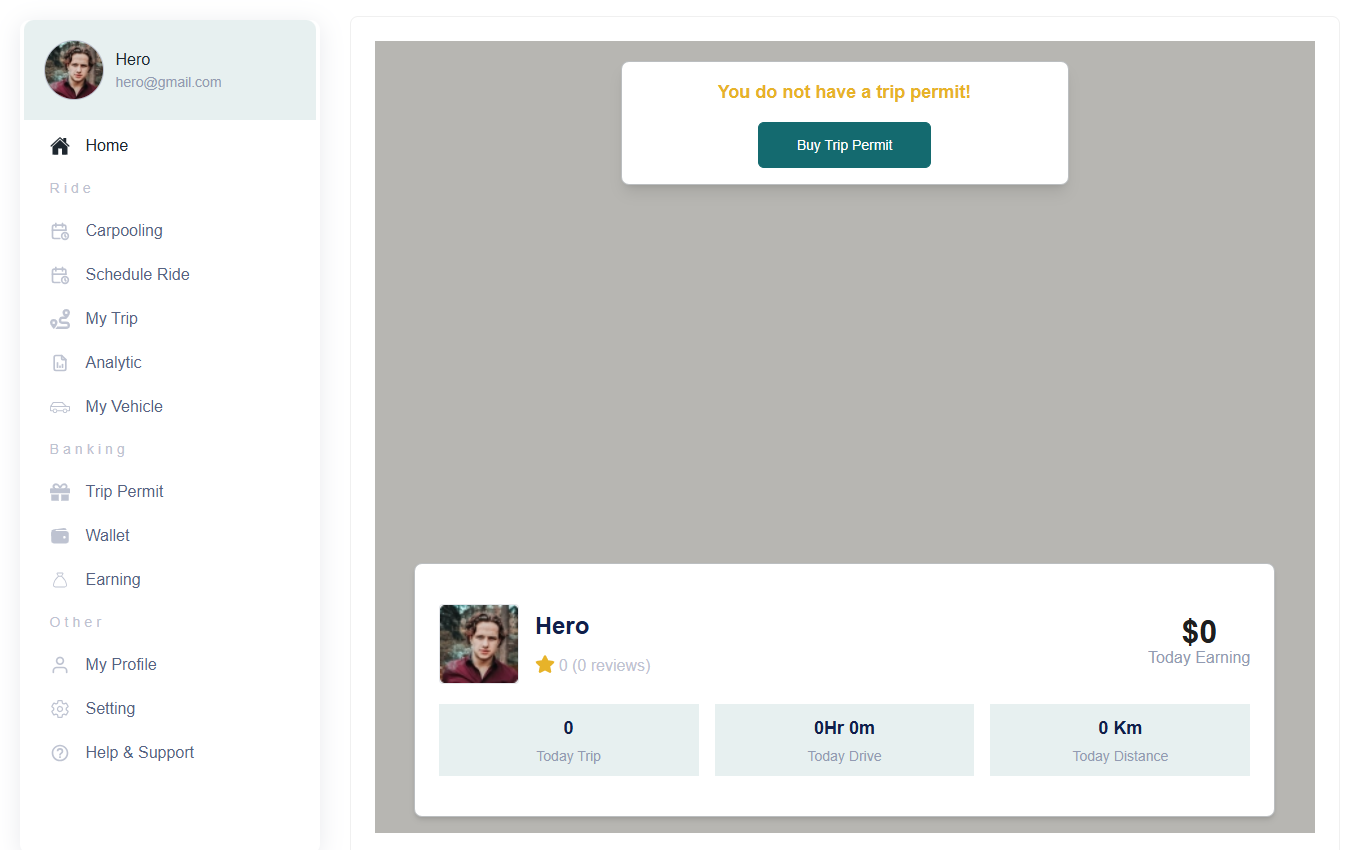
Trip Permit
After verifying your account, you need to purchase a package to get trip permit by clicking the Buy Trip Permit button.
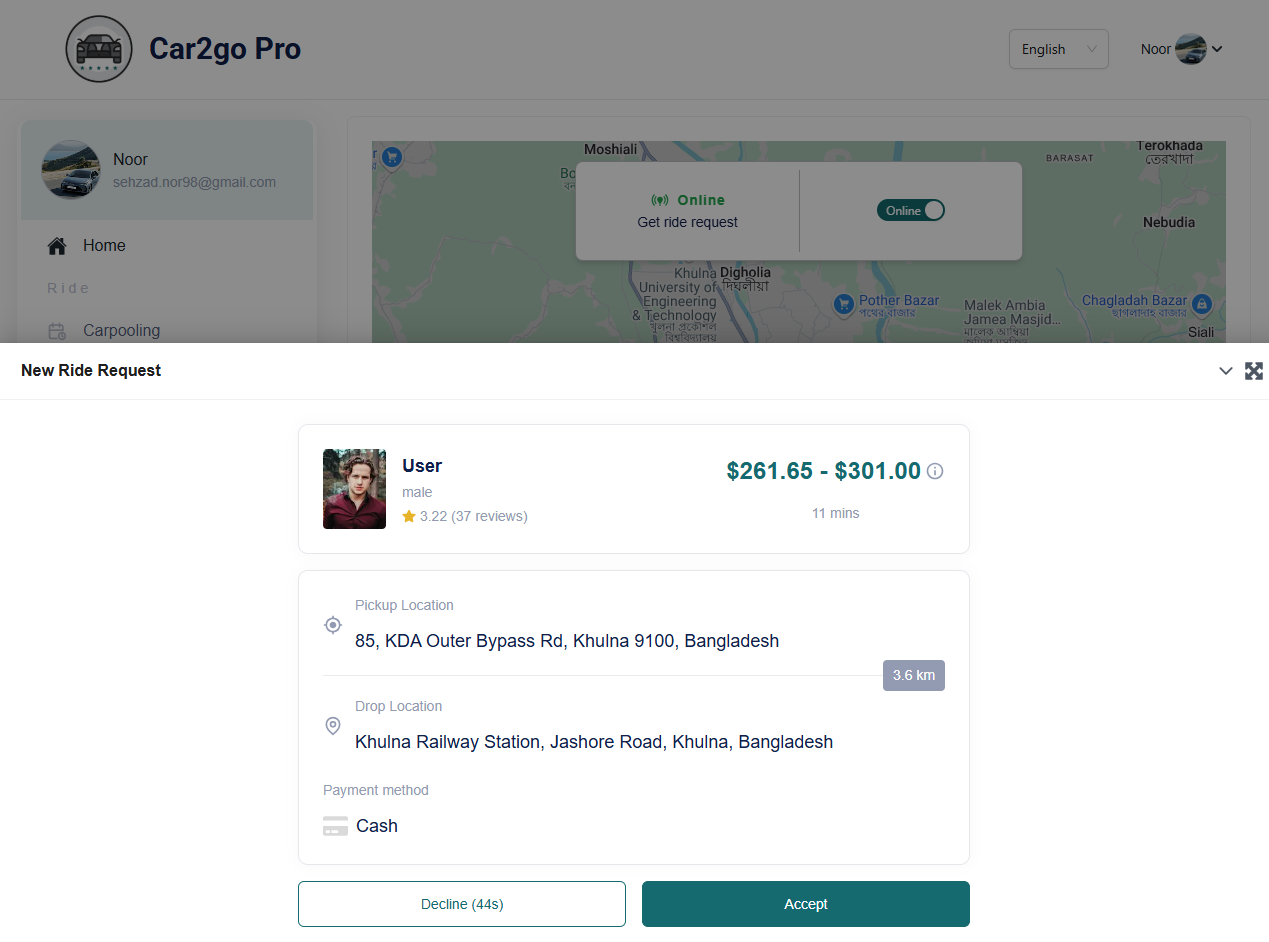
Ride Request
The Ride Request process in Car2Go Pro ensures a seamless and efficient experience for both drivers and passengers. Below is a step-by-step guide on how drivers handle ride requests, from acceptance to completion.
1. Accept Ride Request
When any passenger ride request is sent to you, you will receive a notification. You can accept or reject the request.
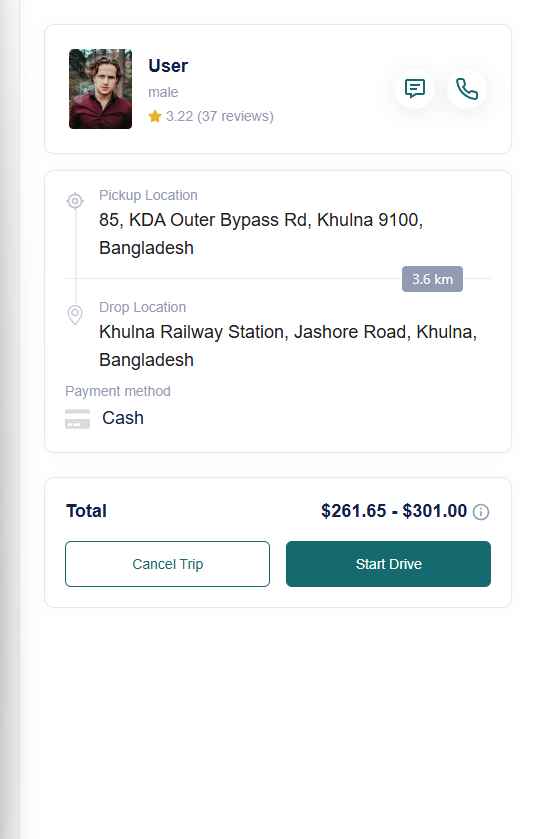
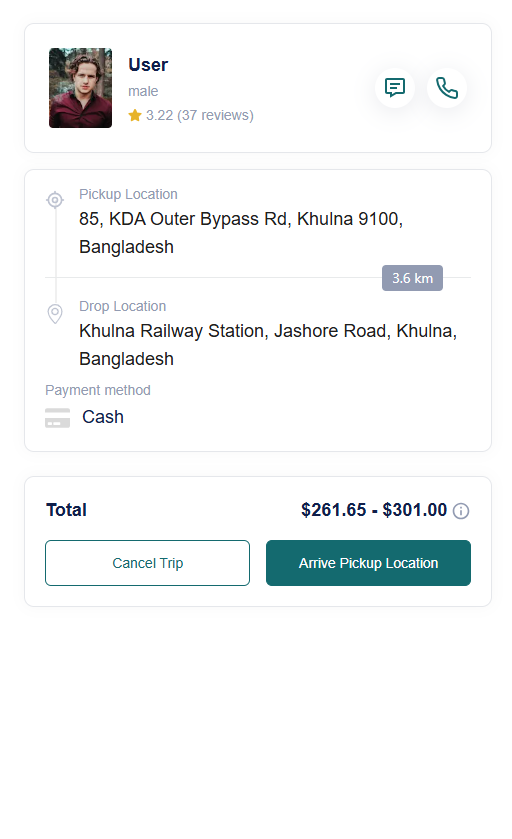
2. Start Ride
Once the ride request is accepted, the driver is redirected to the driver panel. The process includes:
- Clicking the Start Drive button to initiate the ride.
- Upon reaching the pickup location, selecting Arrived Pickup Location to notify the passenger.
| Start Drive | Arrived Pickup |
|---|---|
 |  |
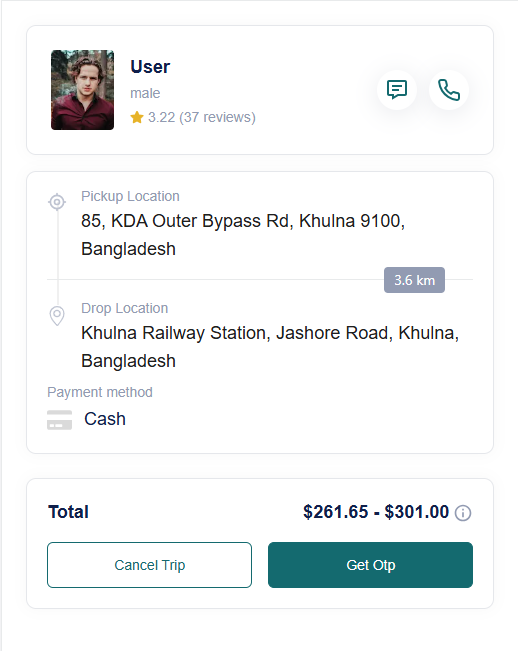
3. Send OTP for Pickup Verification
To ensure passenger security and prevent unauthorized pickups, an OTP-based verification is required:
- Click Get OTP when you arrive at the pickup location.
- The passenger will receive an OTP and provide it to the driver.
- The driver will verify the OTP before proceeding.
| Get OTP | Verify OTP |
|---|---|
 |  |
4. Ride Ongoing
Once all passengers are onboard, the ride begins. The driver continues the ride until the destination is reached.

5. Complete Ride
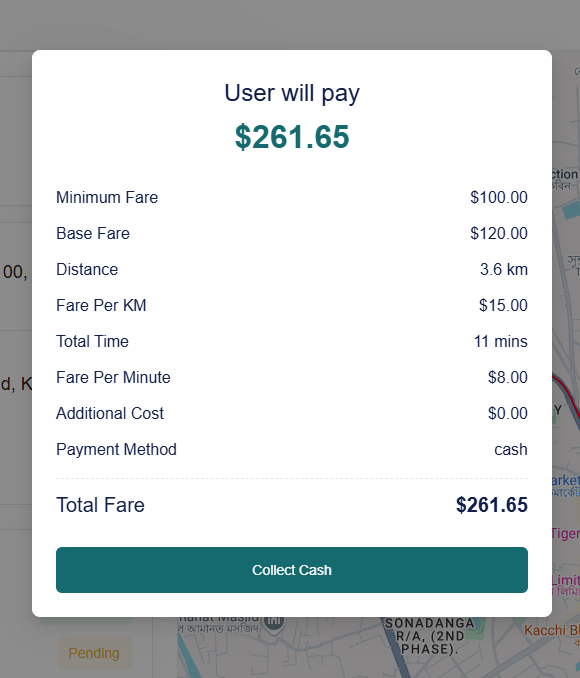
- When a passenger reaches their drop-off location, driver will click Complete Ride.
- If the passenger selected Cash Payment, a modal will appear to Collect Cash.
- If the payment method is Wallet, the driver will see a modal to Finish the ride.
| Collect Cash | Finish |
|---|---|
 | 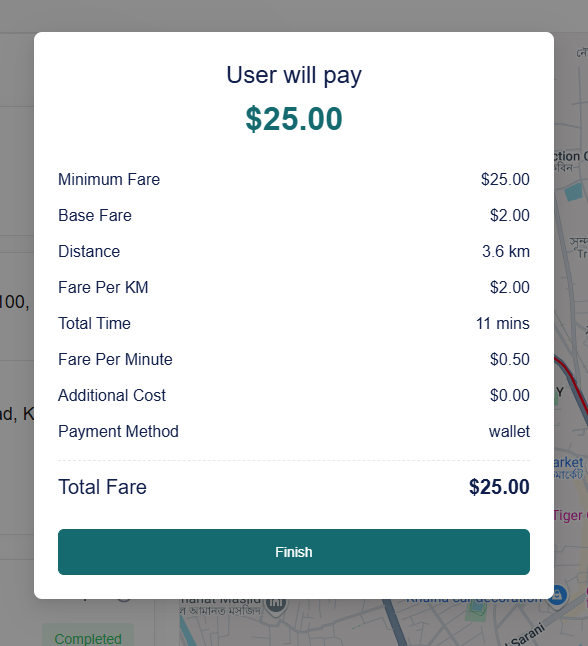 |
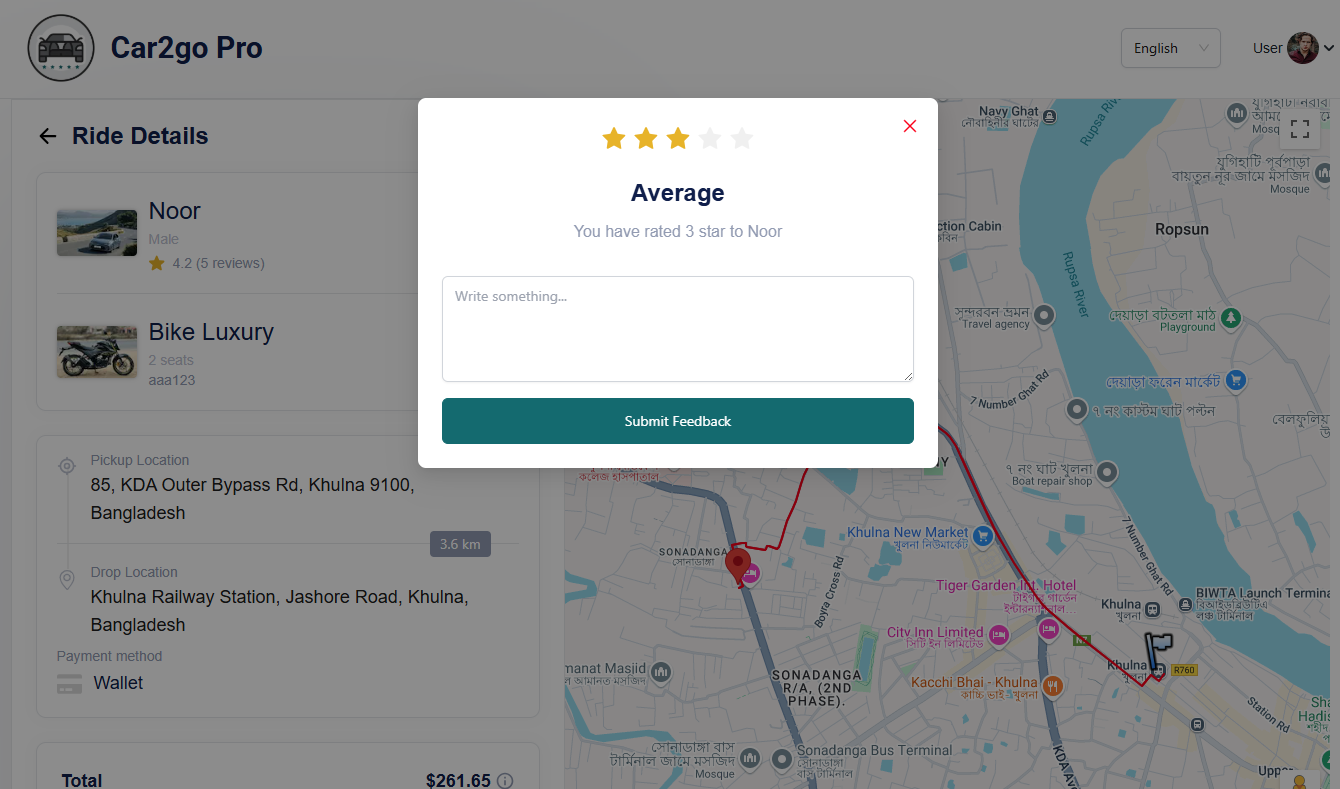
6. Feedback and Rating
After the ride is completed, driver can provide feedback and a rating for the trip.