Backend Installation
Installation process
- Local Installation
- Server / Aapanel Installation
Local Backend Installation Process
Step 1:
- Before running this project on your local development server,
ensure Node.js is installed in your local environment.
If you haven't installed Node.js yet, visit the official Node.js website to download and install it.
Run the following command in your terminal to check if Node.js is installed:
node --version
Step 2:
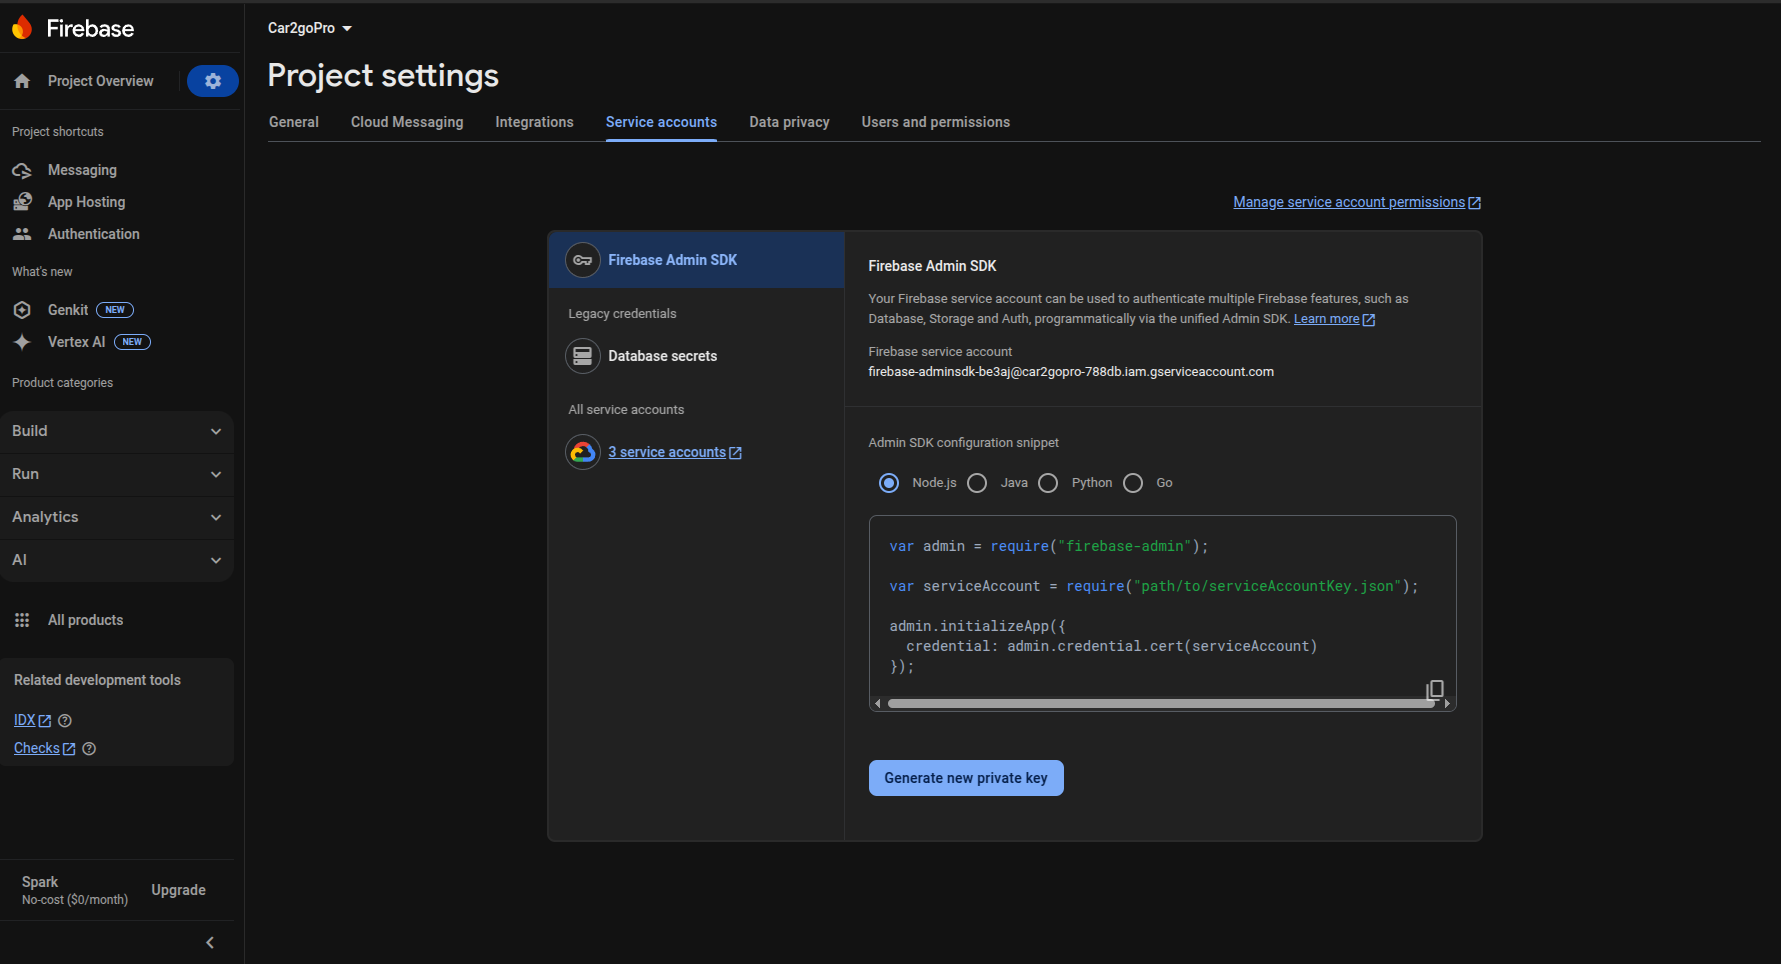
- We need Firebase admin credentials to access Firebase services. For this -
- Create a new project in the Firebase Console
- Navigate to Project Settings
- Go to Service Accounts tab
- Select Firebase Admin SDK
- Choose Node.js
- Click "Generate new private key"
- Open the Firebase admin credentials JSON file using a text editor, then copy its entire content, including the curly braces.
- Now go to the "Car2go-pro Backend" folder and you will find a file named
firebase.json, under the directory ofsrc -> app -> utils -> firebase.json. - Open this file and paste the copied content into the file and save it.
Step 3:
- We require Redis for caching and real-time task management. To install Redis, follow the official installation guide based on your operating system:
- Redis Installation Guide
- After successfully installing Redis, open your terminal and run the following command to check if the Redis server is running:
redis-cli ping- it will return "PONG" if the server is running.
Step 4:
- Install the project package management tool, yarn, by running the following command in your terminal:
npm install --global yarn- After successfully installing the Yarn package, verify the installation by checking its version using the following command:
yarn --version
If the installation is successful, it will display a version number, such as:1.22.19
Step 5:
- Congratulations! You have completed the initial setup. Now, install the required project dependencies by running the following command in your terminal:
yarn installyarn buildyarn start:prod
success
For the initial setup, you need to create an admin account and provide the necessary information through the frontend.
- Run your both backend and frontend server.
- Open your browser and navigate to the frontend URL (e.g., http://localhost:3000).
- Enter the required details and click the "Submit" button.
- Once you receive a success message, restart the backend server.
Your server is now ready for use.
To deploy the backend on a server, you need to follow these steps:
Step 1:
Make sure that your surver is Node.js supported. If not, install Node.js on your server. Here, we are assumming that you are using the Aapanel server management tool.
- First you have to install the Node.js and Nginx from the
App Store. Select the Latest LTS version of the Nginx andNode.js LTS v20.xx.x
Step 2:
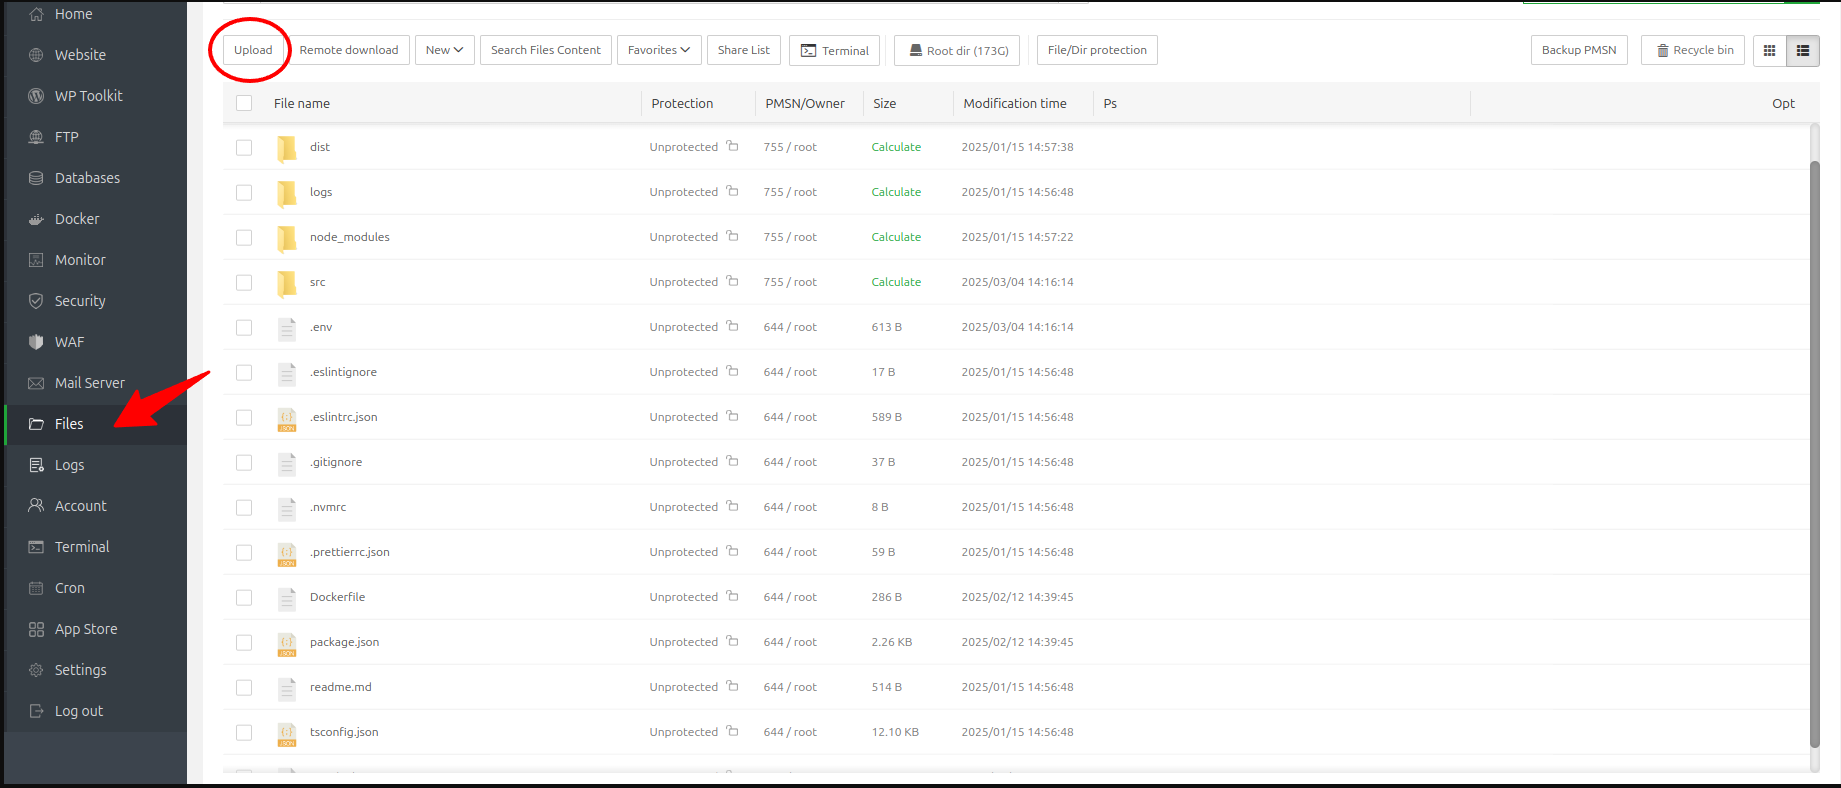
Now create a new project directory for your backend. For that, Select Files and create a new directory. For example:
- Here, I am creating a folder under Root dir > www > wwwwroot > car2go-pro > backend
- Now upload the backend zip file from your local machine to the server.
- Unzip the file and you will get like this:
Step 3:
- We require Redis for caching and real-time task management. To install Redis, follow the official installation guide based on your operating system:
- Redis Installation Guide
- After successfully installing Redis, open terminal and run the following command to check if the Redis server is running:
redis-cli ping- it will return "PONG" if the server is running.

Step 4:
- Install the project package management tool, yarn, by running the following command in your terminal:
npm install --global yarn- After successfully installing the Yarn package, verify the installation by checking its version using the following command:
yarn --version
If the installation is successful, it will display a version number, such as:1.22.19
Step 5:
- Now, install the required project dependencies by running the following command in your terminal:
yarn installyarn build
Step 6:
- After successfully building the project, you have to add a new Node Project. For that, Select
Websiteand tapNode Project. Here, you will findAdd Node projectbutton, click on it. Follow my screenshot for the configuration: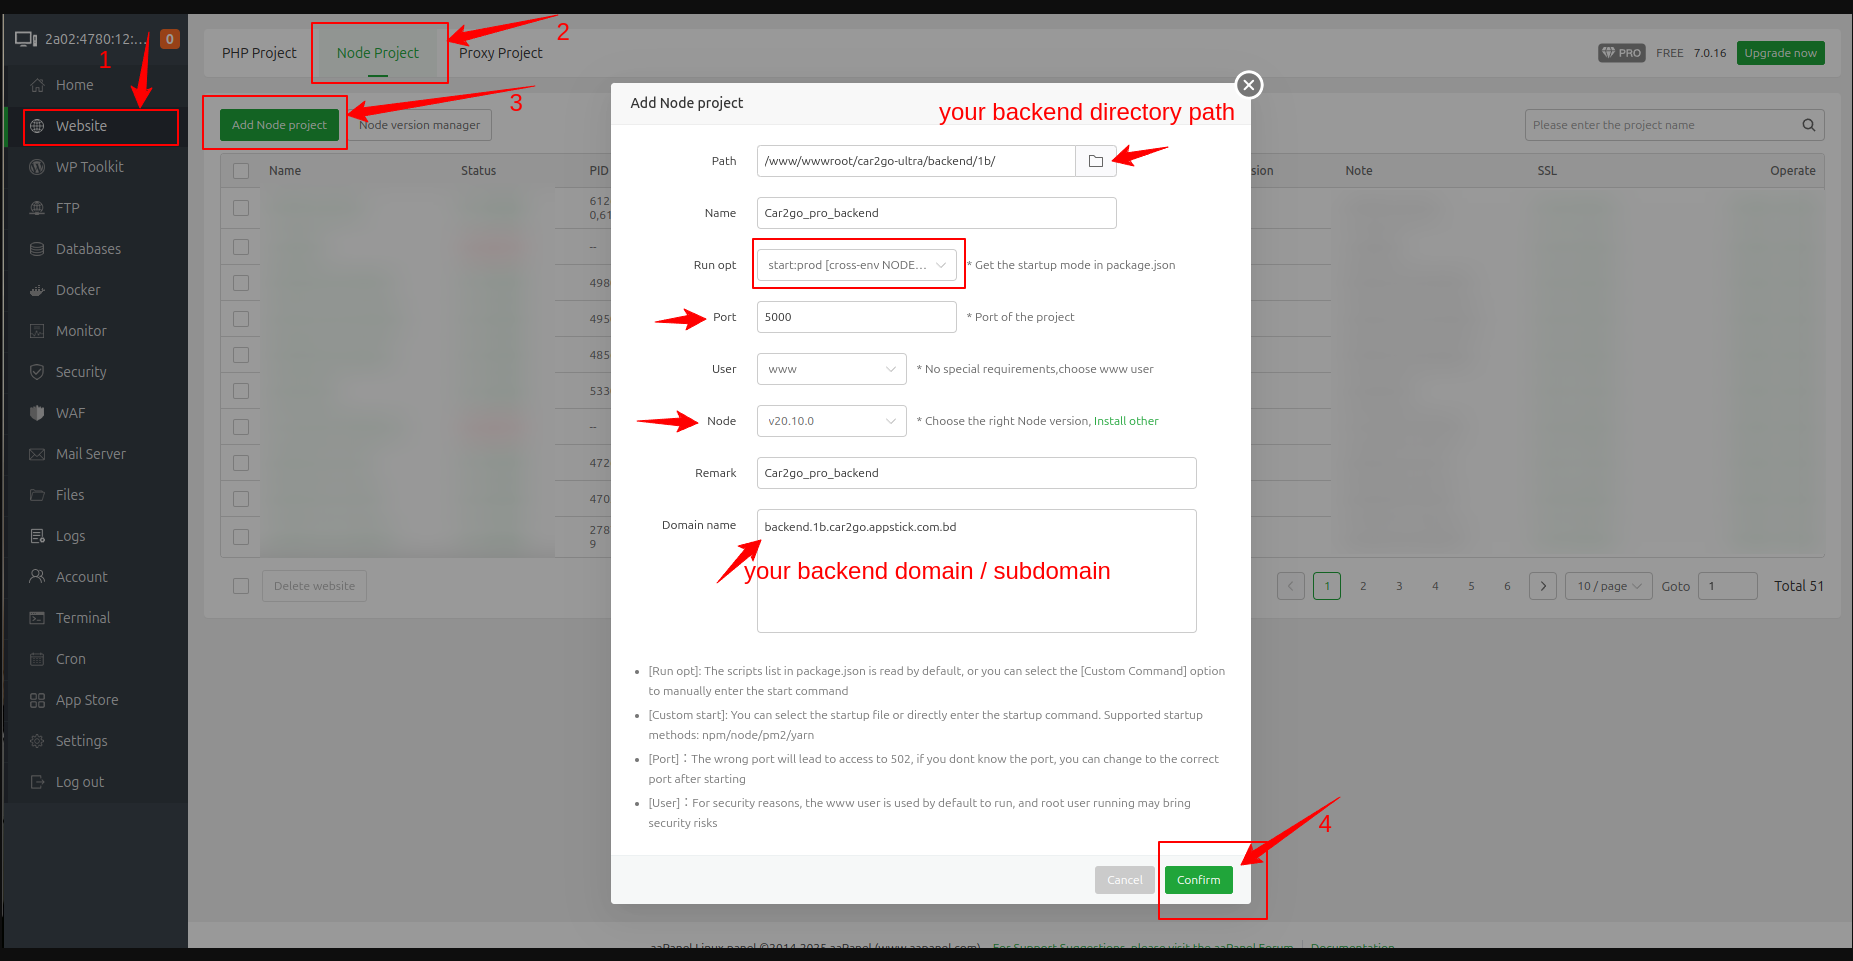 After that, save it by clicking
 Confirmbutton.
Step 7:
- If SSL isn't applied automatically, click on
SSLsection and selectLet's Encrypt. Now select your all domain / subdomain and clickApply SSL.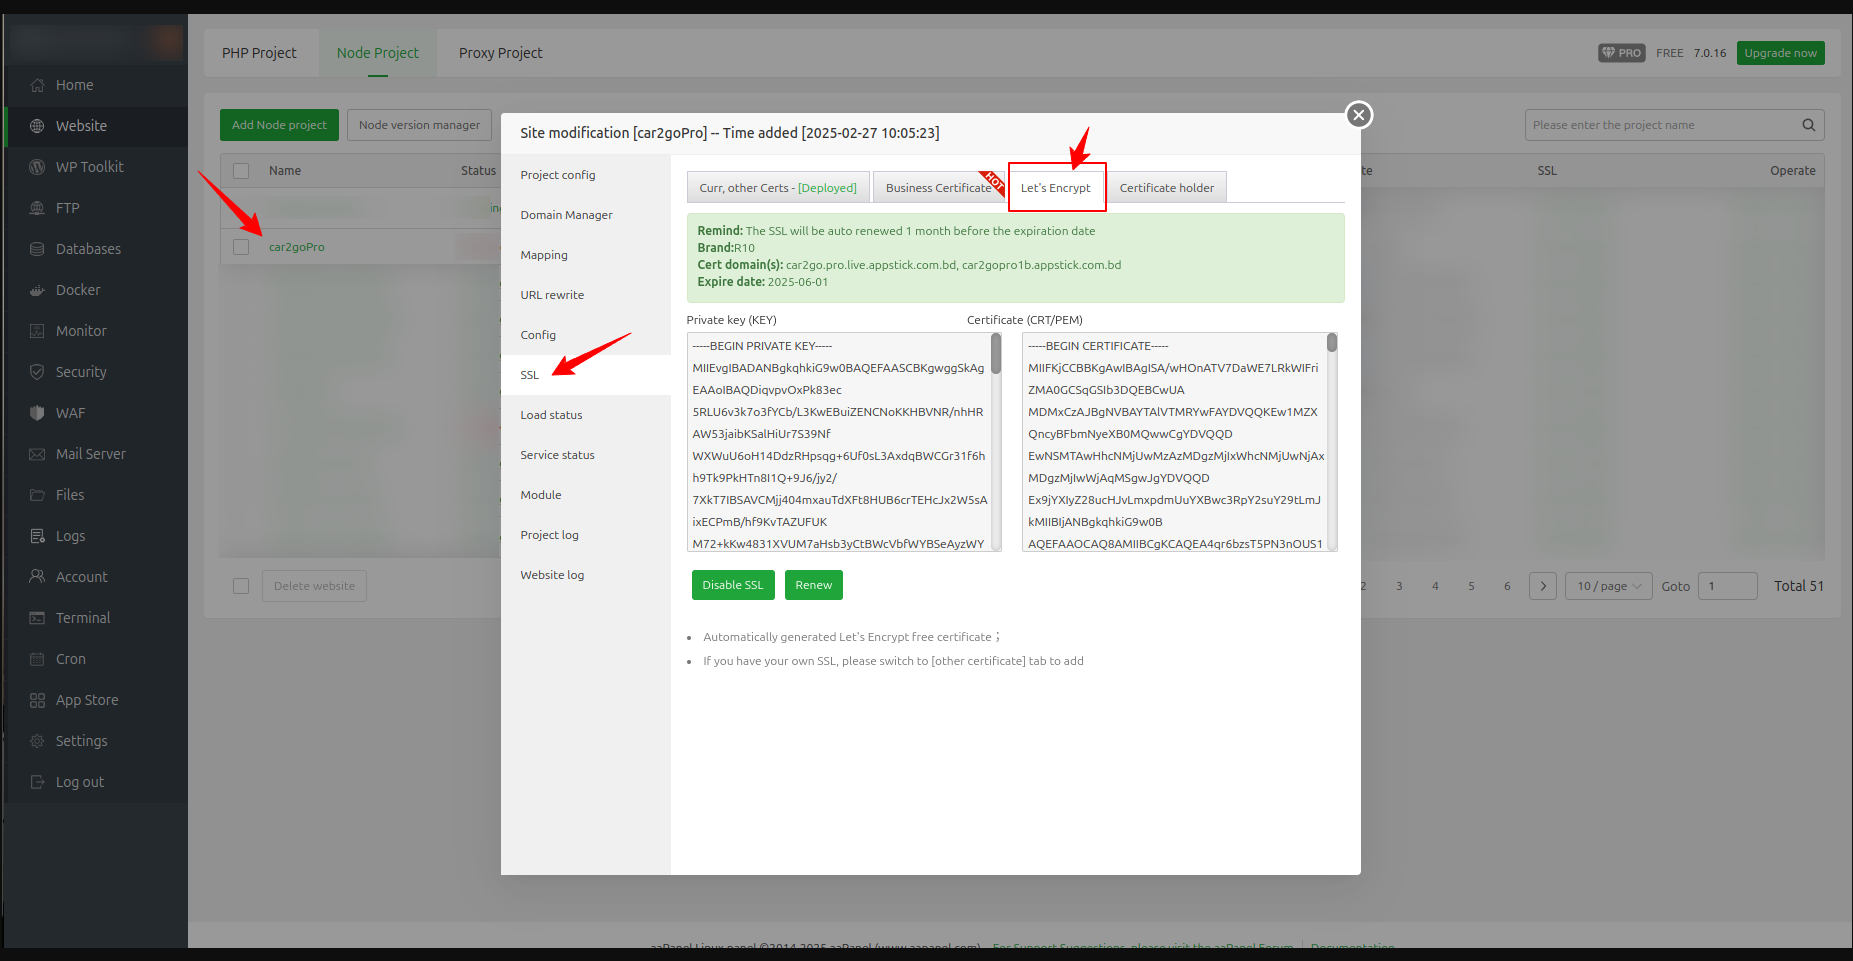
Step 8:
- If you need to
start/restartthe backend server, follow the guide below based on your setup: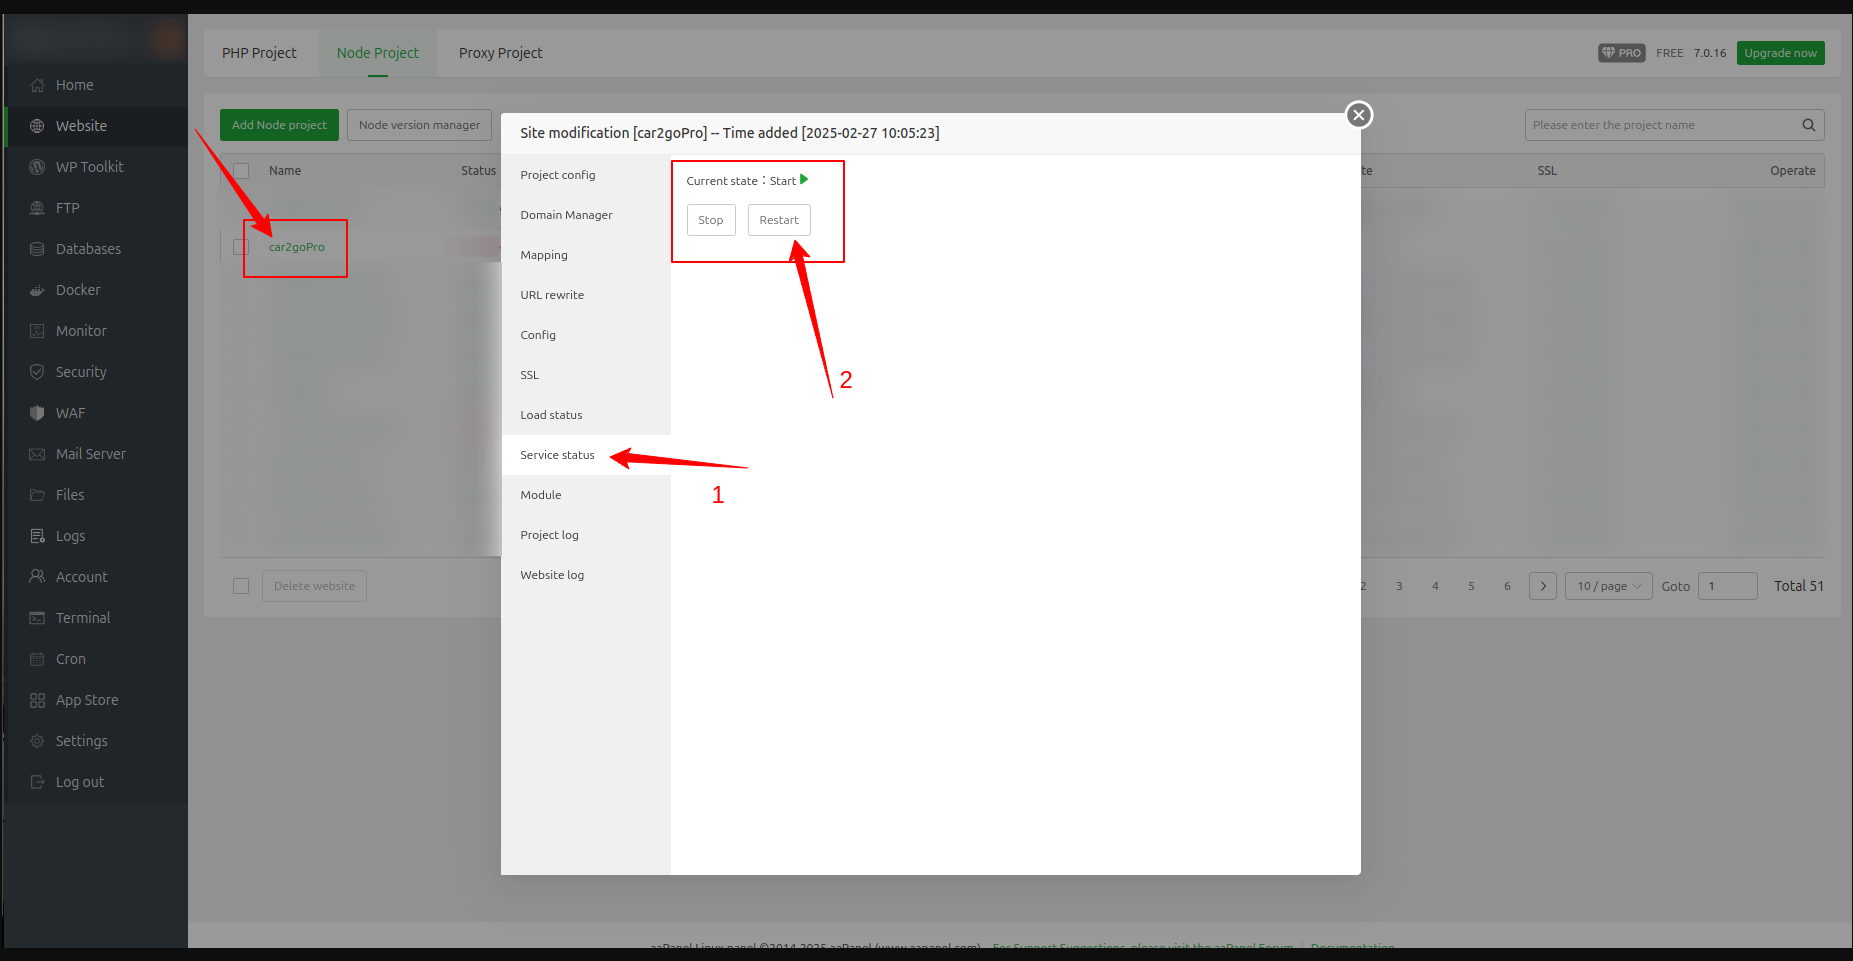
success
Congratulations! your initial setup is complete. Next, you need to create an admin account and provide the necessary information through the frontend.
- Run your frontend server.
- Open your browser and navigate to the frontend URL (e.g., https://car2gopro1b.appstick.com.bd).
- Enter the required details and click the "Submit" button.
- Once you receive a success message, restart the backend server.
Your server is now ready for use.